10.30.2011

Pumpkin Chocolate Chip Bars-best ever!

This is only the best pumpkin recipe I've yet to make. Hands.down! I made D take some to work, and I took some as well, for the sole purpose of getting them out of the house so that I didn't finish them all off myself! They were THAT good. This recipe was adapted from www.bakeat350.blogspot.com

I was very iffy about mixing pumpkin (which I love) and chocolate (which I also love) together in one dessert, but I heard it was good. Plus, brownie-type desserts are my favorite, so I gave it a shot. I also had to make a few changes to the original recipe list (see footnotes) and it still turned out delicious, and a bit healthier, too!

Pumpkin Chocolate Chip Bars
This was before they went into the oven

Ingredients
2 c all purpose flour
1 Tbsp pumpkin pie spice
1 tsp baking soda
3/4 tsp coarse salt
1 c unsalted butter @ room temperature
1 & 1/4 c sugar
1 egg
2 tsp pure vanilla
1 c pumpkin puree (canned pumpkin)
12 oz chocolate chips (11.5 oz bag)
 
* To simplify, I used 1 Tbsp pumpkin pie spice instead of what the recipe called for: 1 & 1/2 tsp cinnamon, 3/4 tsp ginger, 1/2 tsp nutmeg, 1/8 tsp allspice, 1/8 tsp cloves

*To cut the sugar, I used 1/2 c Splenda, 3/4 c sugar

*I only had 1/2 cup + 2 Tbsp butter, so I added 1/4 c canola oil + 1/4 c unsw. applesauce to round it off 
to 2 cups

Directions
1) Preheat oven to 350 & line the bottom and sides of 13x9" pan with foil (you want the foil to come up over the sides so that you can easily remove it from the pan later)
2) Whisk together the dry ingredients: flour, pumpkin pie spice, baking soda and salt.
3) Cream together the butter and sugar on medium-high. 
4) Add the egg & vanilla to the creamed butter/sugar and beat until incorporated. 
5) Do the same for the canned pumpkin/pumpkin puree (may look lumpy-don't worry!)
6) Add the dry ingredients (1/3 at a time) on low speed until just combined. 
7) Stir in the chocolate chips by hand.
8) Pour batter into the prepared pan and spread with rubber spatula until smooth. 

Bake for 35-40 minutes or until a toothpick inserted in the center comes out clean. 
Cool completely in the pan, then cut into bars!
Fresh out of the oven. I wish I would've taken a picture of the inside! So good!

I wasn't sure how these would turn out  with all of the substitutions (intentional and unintentional) that I made, but they were absolutely amazing!!

*Click HERE to view/print the original recipe from bakeat350
10.27.2011

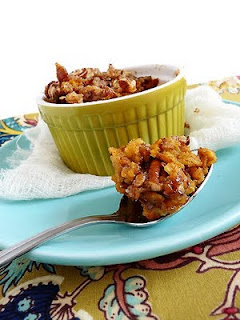
Pumpkin Pie Oatmeal

Just as I promised in the last post, I give you Pumpkin Pie Oatmeal. Sounds too good to be healthy, right? Think again. You will feel like you're having dessert for breakfast. Check out the ingredients-modified from www.goodlifeeats.com.

Pumpkin Pie Oatmeal
 picture from goodlifeeats.com. Isn't it fancy?

Ingredients (my simplified version)
1 packet cinnamon spice oatmeal (mine was lower sugar)
1/4 cup low-fat milk (could technically use water, like oatmeal is usually made)
1/8 tsp vanilla
1 tsp butter
2 Tbsp canned pumpkin/pumpkin puree
*2 Tbsp ground flax seed (optional)
*Chopped pecans/walnuts (optional)

Ingredients (original recipe)
1 cup old fashioned oats, not quick cook
1 Tbs whole flax seeds, optional
2 1/2 Tbs brown sugar, packed
1/2 tsp cinnamon
1/4 tsp allspice
1/8 tsp nutmeg
1/2 tsp lemon zest
1/4 tsp salt
1/2 tsp vanilla
2 tsp butter, softened
3/4 cup pumpkin puree
3/4 cup milk

Directions
1) Mix oatmeal and milk/water together in a ramekin/small microwave-safe bowl
2)  add vanilla, butter, pumpkin & flax (if using) and mix well
3) Place in microwave for 1 minute 30 seconds. 
Stir well, top with pecans, if desired.

*Click HERE to print the original recipe.

You will seriously love this one. Perfect to try on a Saturday morning--it's way quicker than pumpkin pie!

10.26.2011

Pumpkin Spiced Oatmeal Cookies

I whipped these up in no time, and they were the perfect snack! They are actually healthy, too! This recipe was modified from SkinnyTaste.com. Check it out!

Pumpkin Spiced Oatmeal Cookies
Picture from www.skinnytaste.com (once again I forgot to snap a pic of mine!)

I took these cookies on a trip and they were a hit! Great aroma, too!

Ingredients 
1 cup all purpose flour
2 cups quick oats
1 tsp baking powder
1/2 tsp baking soda
1/2 tsp salt
1/2 tsp ground cinnamon
2 tsp pumpkin pie spice
2 tbsp unsalted butter, room temperature
1/2 cup sugar
1/2 cup unpacked brown sugar
1 large egg
6 tbsp canned pumpkin (not pumpkin pie filling)
2 tsp vanilla extract
3/4 cup chopped pecans (optional)

Directions
1) Preheat oven to 350°
2) spray baking sheets with non-stick cooking spray, or line with parchment paper or a silpat.
3) In a medium bowl, combineflour, oats, baking powder, baking soda, salt, pumpkin spice and cinnamon
4) In a large bowl, cream together the butter and the sugars on medium speed with electric or stand mixer   
5) Add the egg, then pumpkin, and vanilla extract
6) Stir in the flour mixture until just combined and no streaks of flour remain (if adding pecans, stir in here)
7) Drop dough by tablespoon-full onto prepared baking sheets. 
*Bake for about 10-12 minutes, or until edges are golden brown.
Cool completely on wire rack.

Gina (at skinnytaste.com) has already done all of the math for you. Thank you, Gina!
Here's what she came up with (and this is with pecans):
Makes 32 cookies, 1 tbsp each.  
Servings: 16 • Serving Size: 2 cookies • Old Points: 4 pts • Points+: 5 pts
Calories: 165.2 • Fat: 6.3 g • Protein: 3.3 g • Carb: 26.3 g • Fiber: 1.6 g • Sugar: 13 g
Sodium: 149.4 mg 

*Click HERE to print this recipe

Just think, if you omitted the pecans like I did (only because I don't like nuts in my baked goods) you saved some calories there. But who's counting anyway? :) I even ate a couple of these for breakfast one day. It was like pumpkin oatmeal to-go! Speaking of pumpkin oatmeal, I've got a good recipe for that coming up soon!

Until the next pumpkin dessert!

10.18.2011

Taco Tuesday- Crock Pot Chicken Taco Soup

I love a good taco soup. And this recipe was just that! It comes from the blog Smashed Peas and Carrots.


This is so, so simple to make and the flavor is outstanding!

Chicken Taco Soup
Ingredients
  • 2-4 chicken breast (no need to thaw!)
  • 1 can corn
  • 1 can black beans
  • 1 can chili beans or light red kidney beans
  • 1 can diced tomatoes with green chiles (rotel)
  • 1 can chopped green chiles
  • 1 28oz can crushed tomatoes
  • 1 12oz bottle of beer (or chicken broth)
  • 1 packet taco seasoning
Directions
1) Drain/rinse corn, black beans & kidney beans
2) Place all  ingredients into the crockpot and mix well. I left the chicken breasts on bottom after mixing ingredients together.
Set on low for 7-8 hours or high for 3-4. Take 2 forks & shred the chicken (I did this while still in the crocck pot, but you can take out and shred, then place back in).
Top with cheese & sour cream, serve with cornbread, tortilla chips or eat by itself. It's delish!

Thank you, Smashed Peas & Carrots!
*Click HERE to print this recipe.

10.16.2011

3 Musketeers Candy Bars

So I made the mistake of showing my husband these recipes for candy bars on Pinterest one day. They have one for Butterfingers, one for Twix, one for Reese's cups, Snickers, York Peppermint Patties, and 3 Musketeers. At least those are the ones I've pinned so far. After seeing this, he immediately asked if we could make the 3 Musketeers (probably because the ingredients list consisted of a total of 3 items). I told him that I had bought bite sized Twix & Milky Way bars for work, so he was satisfied with that at the time. And then one night I noticed him trying to whip up something in the kitchen after dinner. It was the 3 Musketeers bars.

This recipe comes from Monster Mama's blog.

(picture from www.monstermama-monstermama.blogspot.com)

Unfortunately, my husband's version didn't look as neat as this, and I forgot to take a picture. We've yet to discover the neat way of dipping things in chocolate. We will have to work on that!


3 Musketeers
 Ingredients
  • 2 c semi sweet choc chips 
  • 1 (8oz) tub of Cool Whip 
  • 2 c choc  candy coating wafer melts (most stores sell them in baking department)
*We used chocolate almond bark vs. the wafer melts. Also, I felt that the inside of the candies were too chocolate-y (what!? I know..), so next time we'll use less chocolate chips.
(picture also from Monster Mama)

Directions
 1) Line an 8x8" square pan with wax paper. 
2) In a medium bowl, melt chocolate chips in microwave on 50% power for ~30 seconds. Stir  microwave  for 30 more seconds on 50% power. 
3) Beat melted chocolate for 30 seconds on high with an electric mixer. Add the Cool Whip to melted chocolate & beat just until combined and fluffy (~30-60 seconds).
4) Spread evenly into 8x8" pan & place in freezer for about 30 minutes. 
5) Remove from freezer, remove candy from pan & cut into squares. Return back to freezer.
6) Melt candy wafers/almond bark in microwave following package directions. 
7) Take the frozen squares of cool whip/chocolate & dip into melted chocolate, then place on baking tray lined with wax paper. 
8) Place in refrigerator/freezer until chocolate sets/hardens. 
*Store in airtight container in refrigerator or freezer.

You can't beat 3 ingredients! This can be dangerous, however, to have home made candy bars that whip up so quickly! Maybe we'll try out the other candy bars sometime and share with you!

*Click HERE to print this recipe.

10.15.2011

English Muffins

I know it may sound crazy that I made English muffins from scratch, but I eat these things just about every morning and they were not hard to make at all! They do require yeast/time to proof, but it's mostly just time between proofing that you don't have to spend in the kitchen. I made these on a Sunday and it was no big deal. I did have to "wait" a while and be home so that I could go back to the kitchen every few hours, but I it worked out perfect because I could do laundry/watch TV/go walking, etc while they were rising.

This recipe came from the blog Budget Bytes.They even broke down the cost of ingredients. You can't beat $0.68/recipe, $0.08/muffin!

English Muffins
Ingredients list/cost breakdown-straight from the website!
INGREDIENTS COST
1 tsp active dry yeast $0.11
1 Tbsp sugar $0.05
1/2 cup milk $0.18
2 Tbsp butter $0.05
3 cups flour, divided $0.18
3/4 tsp salt $0.05
1/4 cup cornmeal $0.05
as needed non-stick spray $0.05
TOTAL
$0.68

Directions (copied from Budget Bytes' blog)
STEP 1: In a small bowl, combine the yeast, sugar and 1/2 cup of warm water. Stir to dissolve the sugar and yeast. Let sit about 5 minutes or until foamy on top.

STEP 2: While the yeast/sugar mixture is resting, combine 1.5 cups of the flour and salt in a large bowl. Stir well to evenly distribute the salt. In a second small bowl, combine the milk and butter. Microwave the milk/butter for 30 seconds, stir and microwave again for 30 seconds. Stir the butter until it melts into the warm milk.

STEP 3: Pour the yeast mixture and the milk mixture into the flour. Stir until it has combined into a pasty mix. Adding 1/4 cup at a time, stir in more flour until the dough forms a soft, slightly sticky ball that pulls away from the bowl. I added about 3/4 cup to get it to this point.

STEP 4: Sprinkle a little bit of flour onto a clean countertop and coat your hands in flour. Dump the soft ball of dough out of the bowl and knead it for about 5 minutes. Add as little flour as possible to the countertop while kneading. Adding too much flour will yield tough muffins. I found that a very slight sprinkle was all that was needed to keep it from sticking (see photos below for an example).

STEP 5: Shape the dough into a ball and place it in a bowl that has been coated in non-stick spray. Lightly spray the top of the dough and cover with plastic wrap. Let rise until double in size (about 45 min - 1 hr).

STEP 6: Punch the dough down, shape it into another ball, cover the bowl/dough and let rise a second time (45 min - 1 hr or until double).

STEP 7: Punch down the dough again and turn it out onto a well floured countertop. Using a rolling pin, lightly roll the dough until it is about 3/4 inch thick. Using a cookie cutter, biscuit cutter, opened (and cleaned) can, or a large round glass, cut the dough into circles. When you can't cut out any more circles, gently ball the remaining dough, roll again and cut more. It gets more difficult to ball and roll out each time so fit as many circles in the dough as possible before balling it up again.

STEP 8: Place the cut dough circles onto a sheet pan that has been liberally covered in cornmeal. Sprinkle more cornmeal on top of the muffins. Cover loosely with a damp towel and let rise, once more, until double in size (another 45 minutes).

STEP 9: Heat a large skillet over medium-low heat. Spray the pan with non-stick spray. Carefully transfer the fluffy, risen muffins to the hot skillet with a spatula. Cook the muffins, in batches, in the skillet until they are golden brown and crispy on each side. Make sure to keep the heat low so that the outside browns slowly, allowing time for the inside to "bake." I cooked mine for about 7 minutes on each side but this will vary from stove top to stove top.

STEP 10: Let the muffins cool on a wire rack before attempting to slice open. Toast the split muffins in a toaster, slather with butter and jam then ooze with happiness!

 You just can't beat the taste of home-made bread of any kind! Will I be making these on a regular basis? No, but I will surely make these again! Thanks, budget bytes, for this recipe for a home-made favorite of mine, and also for the cost analysis!

 *Click HERE to print this recipe.

10.10.2011

Baked Pumpkin Spice Donuts

Donuts. PUMPKIN donuts. BAKED pumpkin donuts. The most delicious pumpkin-y thing I've whipped up yet! I can't take any of the credit, though. This recipe came from The Blue Eyed Bakers. Yes, they are baked vs. fried, BUT they are dipped in melted butter and rolled in cinnamon & sugar. So not your healthiest option, but you can definitely skip the final touches and enjoy the plain baked donut. I'm sure it would be good, just not as good as these. Ok, I'll get down to the recipe now.

But first, go ahead and make a trip to Bed Bath & Beyond (or wherever in your town that you can find one of these pans) to purchase a donut baking pan. I know, how often will you actually use this thing? A lot since you can just as well whip up a muffin recipe and cook it in the donut pan instead of your muffin tins :). And it cost a whopping $6.99.

Baked Pumpkin Spiced Donuts


Ingredients
For Donuts:
1 3/4 cups flour
1 1/2 tsp baking powder
1/2 tsp salt
1 tsp cinnamon
1/2 tsp nutmeg
1/2 tsp allspice
1/8 tsp ground cloves
1/3 cup vegetable oil
1/2 cup brown sugar
1 egg
1 1/2 tsp vanilla extract
3/4 cup canned pumpkin
1/2 cup milk

For Coating:
1/2 cup butter, melted
2/3 cup sugar
3 Tbsp cinnamon

Directions 
1) Preheat oven to 350 degrees F.  
2) Butter a mini donut pan & set aside.
3) Mix flour, baking powder, salt & spices together in a medium bowl & set aside.
4) In a large bowl, whisk together oil, brown sugar, egg, vanilla, pumpkin & milk until combined. 
5) Slowly add the dry ingredients into the mixture & stir just until combined. Do not to over mix.
6) With a spoon, fill each donut cup with the batter. The donut cups should be fairly full, but not overflowing. 

Bake for 8-9 minutes, until donuts spring back when gently pressed (if you're using a larger donut pan, allow them to bake for 12-15 minutes).  Place baked donuts onto a wire rack & allow to cool.
While the donuts are cooling, melt butter in one bowl & combine the sugar and cinnamon in another.  When donuts are still hot (but not too hot to touch), quickly dip each donut in melted butter, then coat in the cinnamon-sugar mixture.  Serve immediately.

There are no more words. You just have to go make them. You will thank me (& the Blue Eyed Bakers)!

*Click HERE to print this recipe.

10.01.2011

Spicy Honey Chicken

I tried this chicken recipe on a SUPER hot day this summer, and this was the perfect accompaniment. It was fairly simple, too, thanks to www.the-girl-who-ate-everything.com!


Spicy Honey Chicken
spicy goodness!

Ingredients
8 boneless skinless chicken thighs, about 2lbs (I used breasts)
2 tsp canola oil

Rub:
2 tsp granulated garlic (I used garlic powder)
2 tsp chili powder
1/2 tsp onion powder
1/2 tsp coriander
1 tsp kosher salt
1 tsp cumin
1/2 tsp chipotle chili powder (found in the spice aisle, look close)

Glaze:
1/2 cup Honey
1T Cider Vinegar

Directions
1) Combine the rub spices in bowl and mix well.
2) Use kitchen shears to trim off any excess fat from the chicken pieces. Pat dry. 
3) Drizzle oil over chicken and rub in with your hands to lightly coat all the pieces. Then toss chicken with the spice rub to coat all sides well. Use your hands and get in there! 
4) Grill chicken for 3-5 minutes on each side, until cooked through.
5) While chicken is cooking, warm honey in the microwave so it's not so thick. 
6) Add the vinegar and combine well. Reserve 2T honey glaze for later. Take the rest and brush on chicken (both sides) in the final moments of grilling.

I used a stove-top grill and these turned out perfect. The website suggested making a spicy honey chicken salad with a citrus vinaigrette. 

*Click HERE to print this recipe/visit the website for the salad recipe.